
Autumn Air Soap
October Soap Challenge Club 2021

This blog post is for soap makers or anyone interested in the soap making process.
Almost every month, I participate in the Soap Challenge Club, hosted by Amy Warden of Great Cakes Soapworks. I have been participating in the challenge for years because, as you all know, I’m a bit obsessed with soap making. I love learning new soap making techniques, it is really about the love of learning and growing as a soap maker. This month’s challenge was a recycled soap scrap method. There were many options to choose from, confetti soaps, tile soaps, mosaic soaps, so long as the majority of the soap was made with recycled soaps from previous batches. Soap makers end up with a lot of scraps from the ends of loafs or beveling our soaps and this was a great way to use them up. I love recycling and earth friendly products, so this was right up my alley. I try to make earth-friendly choices by using little packaging with my soaps and reduce plastic waste with shampoo & conditioner bars.
I chose the Ciaglia method, as I liked the idea of finely processing the scraps so that they are barely visible. There were several issues that I had to overcome to get the soap batter fluid with this method. First, the pieces had to be finely diced. I put them through a salad shooter, then cut them into finer pieces before chopping them up again. I also let them sit in the soap making oils to soften them before using an immersion blender; then, adding the lye water. I had noticed from the tutorial that the addition of the soap scraps tended to thicken the batter making it difficult to add decorative touches. The week before, I had been making castile soap, which is 100% olive oil. Castile soap takes longer than most formulas to start to “trace” or thicken. This led me to envision making a soap with a high percentage of soft or mostly unsaturated fats that would take a longer period of time to come to trace. This would allow it to remain fluid longer once the scraps were added and able to pour easier.
Some things I noticed about this method were that the resulting soap was very soft as I had only added 20% hard oils. Also, the portions of the soap that were not forced into gel were lighter and the soap scraps were more readily visible. The gelled soap had a more uniform appearance. See picture below, the ungelled soap is on the left. It was from the same batter as the loaf I used to make the "trees".

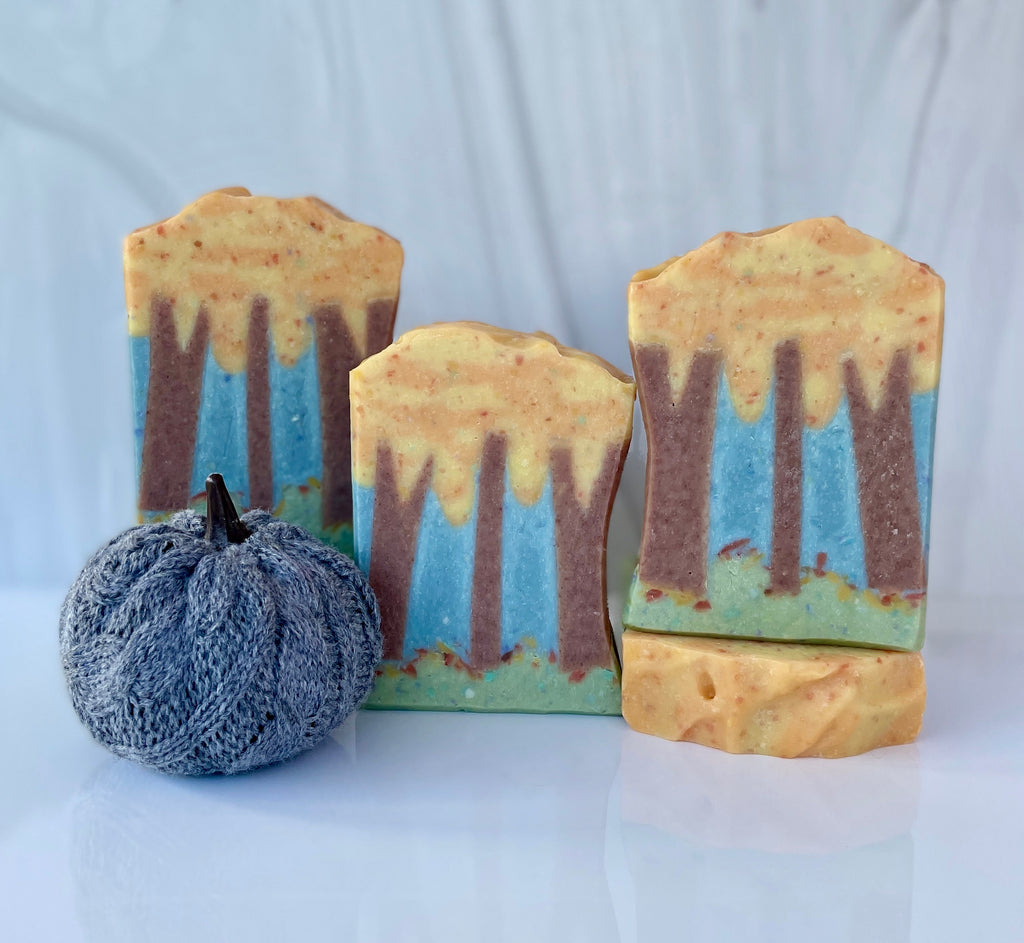
I made a small batch of brown soap made with previous soap scraps colored with cocoa powder to serve as the trees for this soap. The benefit of the soap being very soft was that it was easily carved into the trees.
The green portion of the soap I wanted to thicken quickly, so that I did not have to wait to insert the carved soap trees, so I used the immersion blender longer with this layer. I added the orange, red, and yellow confetti pieces on top of the “grass” as decorative leaves. Next, the blue layer was added and allowed to set up. I sculpted the soap in between the trees with a butter knife to allow the foliage to become more realistic. For the leaves, I added sodium lactate to keep the batter fluid longer to allow pouring in a modified drop swirl method. I wanted to keep the edge of the tree curved slightly on the one side, so I pushed the tree limb to the edge of the mold so that the blue portion of the soap stayed on the inside of the design. For fragrance, I used a combination of citrus essential oils and bamboo teak fragrance oil.
I used the following formula for the base and added soap scraps at 30% of the weight of the base oils:
Coconut oil 10%
Palm oil 10%
Castor oil 10%
Olive oil 30%
Sunflower oil 40%
After adding the 33% lye water (2:1 water to lye) I used the immersion blender until the soap started become opaque and then stirred by hand to avoid over-thickening the soap batter. This took some patience as oil continued to float on top of the batter, but after 5 minutes of hand stirring it came together. I insulated the soap and forced gel phase as I find with layered soap they tend to fall apart if the gel phase is not forced.
In all, this soap involved several soap making techniques: Ciaglia, layering, soap carving, embeds, soap sculpting, and drop pour methods. I love Fall, it is my favorite time of the year and I had been thinking about making a fall-themed soap. I can't wait to see everyone's soaps this month.

For fun, here is a picture of our cat Oreo enjoying the Autumn air this week:

Take Care,
Jamie
Amy Warden
This is such a beautiful and well-planned design, Jamie!! Excellent colors – and I love the added leaves in the grass! Also, the side of the soap that has the tree on the side gives it a unique shape and character. I love Fall too!!